Monday, January 30, 2012

12 Months of Christmas Project-January-Cork Ornaments

Let me preface this post by saying -Yes, I know Christmas is over and everyone has moved onto thoughts of spring by now.  Having said that, I need to let ya'll know I did enter a 12 Months of Christmas Project Challenge........that means I need to create a Christmas craft each month this year and share it on the 12 Months of Christmas Project blog site.   I figured I would also include it on my own blog in case it sparks interest in any of you!  Also, many things can be used for other holidays if just tweaked a bit.
By the way, anyone can join along.  This fun idea was the creation of Aileen over at Aileen's Musings. You do not have to have a blog to be a part of the project.  Just take a look in the right hand margin of my blog and you will find the link.

I love making things with corks.  I love their color and love their texture (I just used the word 'love' 3 times, whoops 4 times!).  I saw photos of cork ornaments on Pinterest and various other sites this past Christmas and by then it was too late to make some for myself so I am making them this year.  Take a looky at my rendition.

Drum roll please.....


Notice this one is a champagne cork, I decided this bad boy deserved 2  crystals.

So far I have made 6
These are super simple to make.  Once the holes are drilled, it literally takes less than a minute to assemble each one.

First you get some corks.  I just happen to have them hanging around the house.  I have everyone I know save them for me throughout the year.  I actually display them as I am collecting them.  

Dining room buffet

China cabinet

China cabinet again
Once you've chosen your corks all you need to do it use a drill bit just a bit bigger than an embroidery needle and drill through.

I highly recommend using a vice so the cork won't move.

Those are man hands!!  Thanks G-man

See, needle goes in nice and smooth

Albert is always monitoring the situation

Once you have the holes drilled, just assemble what you will be using to embellish and the rest is a cake walk.

I just used what I had on hand.  Some pearl beads, chandelier crystals & wire

I actually deconstructed this pink bead spray and used the wire to string through the cork
because I liked how thin the wire was


For this one all I did was first string the wire through the little hook on the crystal, twist it to close it up, then string the wire through a few pearl beads, then through the cork, then I strung on one more bead and finished it off by twisting the wire into a loop around one of my fingers to give a place to put a hook for hanging.
These would also look great with some twine or ribbon pulled through the top and tied around a bottle of wine. 

I especially love the contrast of the crystals with the cork
If you enjoyed this post, past posts, future posts please leave me a comment in the comment section just below this post.  I love to hear from my readers!!!  
You can also 'like' me on facebook (over in the right margin) and become a follower (also in the right margin).
Thanks!!
-Lisa

                                                             I've linked this post up to:


Stuff and Nonsense
 
and
 
Chef in Training
The Farmhouse Porch/Cowgirl Up!

Sunday, January 29, 2012

Coffee Filter Lampshade Tutorial (yes, coffee filters)

Coffee filter wreaths, coffee filter lamp shades?  P-a-leeeese!  Sounds so tacky. 
Well guess what?  They totally rock!
The're all over blogland and probably considered passe' at this point.  As usual, I was tardy to the party and just discovered them myself about a year ago.  I think the wreaths are so lovely and the lampshades are so adorable!  

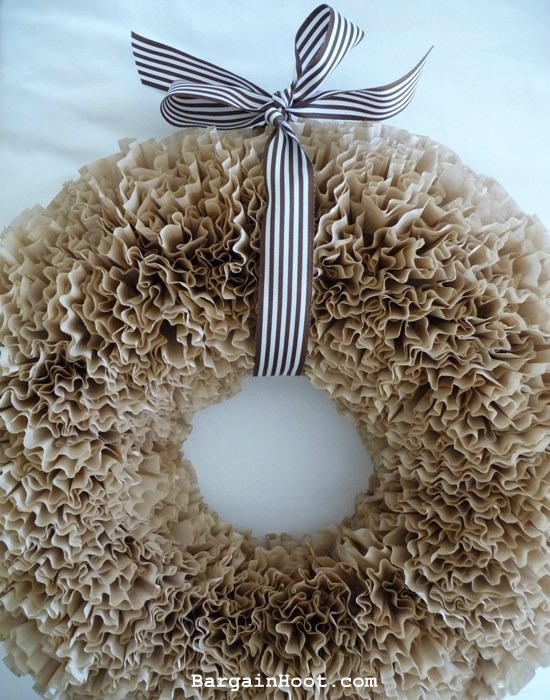
Here are photos of pretty wreaths.  You can use the bleached filters that are white or the unbleached filters that are light brown.


I made this one and dress it up differently depending on the season.

What I absolutely adore are the lampshades.  I have made a few myself and couldn't be more pleased.  These are so easy to make and so inexpensive.  I thought I would show you how easy it is to transform an old tired lamp base and shade into a darling lamp.
First, here are a few pictures of a couple I have already made:


I think this is my favorite so far!


This is a large drum shade that is stunning when lit up.  Both are waiting for new lucky owners at a local shop.
 So here is a quick little tutorial that shows just how easy it is to make one.  The base and shade I am demonstrating are both thrift shop finds.
This adorable little lamp base was so sad looking when I found it but I saw the potential.  See the price?  I really splurged on this little guy!


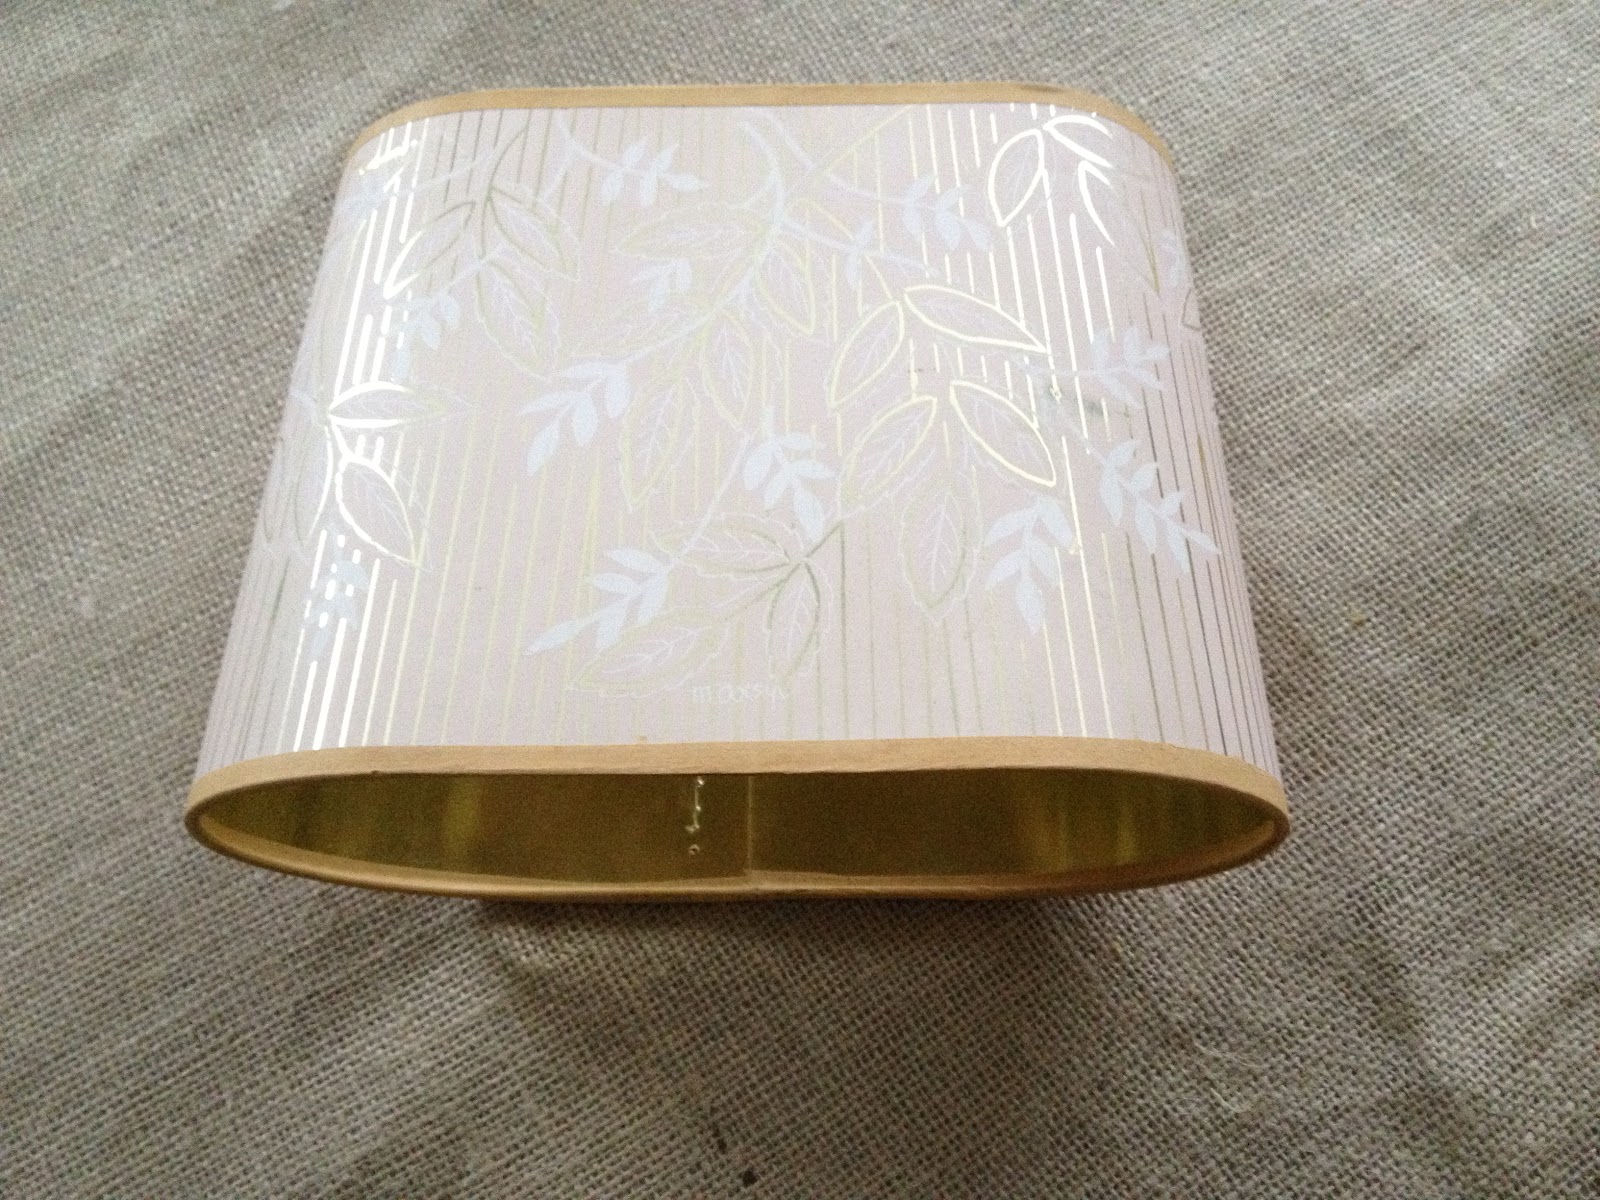
I had picked up 2 of these great retro shades over the summer.  Loved the shape and I knew I would find a use for them someday.  $4.00 for a pair.


The shade and base were meant to be together!  Just needed a few upgrades.


I gave the base a good scrubbing and then spray painted it a wonderful turquiose.


Onto the shade. 


Get yourself some coffee filters.  Don't worry, you don't need this many.  I'm just a little nutso. 
About 200 - 250 should do the job.


Fold each one in half


In half again


And say it with me one more time---in half again


Once you have folded the filter into quarters you then need to fold the bottom point up about an inch

Once you have folded a crazy amount of filters, you need to get your handy dandy glue gun ready for some fun.


 Grab your glue sticks, crank up the tunes, grab some sparkling water and get busy girlfriend we don't have all day!


There really is no magical way to glue them on.  I tend to make sure the top has all the points pointing toward the bottom of the shade to keep the top layer uniform.  After that you can do all different directions or all the same, it depends on the look you want.


Once you have it all covered you will want to light it up and step back to see if there are any gaps.  If so, just fill them in.  At this point you may need to cut part of the point off so you can fit the remaining pieces in.


I always finish the top off with cording hot glued so you get a nice finished look.


Now for a refresher. 


Here is our sorry little sad sack

Here is our little glam girl ready to take on the world!


Does this shade make me look fat? 
 

Lillie approved!


I'm even cuter in person.


Hope you enjoyed this cute little tutorial!
-Lisa


I've linked up this post to:

My Girlish Whims

  {Primp}
              
 Chef in Training

It's Overflowing!

    The Shabby Nest Frugal Friday

Tip Junkie

    RESTORE INTERIORS

         My Uncommon Slice of Suburbia

          Be Colorful/Motivated Monday
                
            The Farmhouse Porch/Cowgirl Up!


Friday, January 27, 2012

Annie Sloan Chalk Paint and a Blog Feature!


I will be attempting my first Annie Sloan Chalk Paint project in the near future.  I have done lots of research but have to admit I feel a bit intimidated because the results I have seen are stunning.  So stunning in fact I can't imagine the possibility of doing nearly as good a job as my fellow bloggers.


A few things I've found out about the paint:
- it's not to be confused with chalkBOARD paint 
- it covers any surface including waxed and varnished pieces,clay and concrete pots, even
  plastic and formica.  
- there's no need to strip or sand before using it on the furniture you're refinishing
  (that's a big draw for miss lazy pants over here!)
- it creates an amazing distressed, worn look.  
- it can be buffed to a shine
- it looks and wears best if it is coated with furniture wax
- I have never come across a negative review of it  


The paint is not cheap, about $35 for a quart but the look is worth it.  It is not easily found - at least where I live.  It can be ordered online via the Annie Sloan site, there is also a list on the site of retailers who do sell it.


Here are just a few pictures of the wonderful look achieved with the paint.

Via Miss Mustard Seed

via Conspicuous Style
Old_white_table  google images


As I was 'researching' I came across this beauty created by Rachel over at My Vintage Verve.


Rachel picked this jewel up for a whopping $25!  
Here is what it looked like before she worked her magic.


You must check out her post here and see how easy it was for her to create this beautiful buffet.
Rachel has lots of other great information on working with Annie Sloan Chalk Paint in the tips and tools section of her blog.  Stop in and say hi!


Now I have to go looking for a sacrificial piece of furniture for my first chalk paint attempt.... 


-Lisa